
In today’s connected world, video calling has become essential for personal chats, family catch-ups, remote work, and online collaboration. Viber, one of the most popular messaging apps with over a billion users worldwide, offers robust video calling features that make staying in touch simple and secure. Among its standout tools are screen sharing and the ability to record sessions—perfect for demonstrations, tutorials, or preserving important conversations.
Whether you’re troubleshooting tech issues with a friend, presenting ideas in a business meeting, or teaching a skill remotely, knowing how to share your screen during a Viber video call or record a Viber video call can significantly enhance your experience. This comprehensive guide covers everything you need to know about these features, including step-by-step instructions, platform-specific tips, real-world applications, advantages, common troubleshooting, and the latest trends as of 2026.
Why Screen Sharing and Recording Matter in Viber Video Calls
Viber’s video calls are end-to-end encrypted, ensuring privacy while delivering high-quality audio and video. Screen sharing takes collaboration to the next level by allowing participants to view your device screen in real time. This is especially useful for:
- Remote technical support: Show a family member exactly how to fix an app issue.
- Business presentations: Walk colleagues through slides or documents without sending files.
- Online education: Demonstrate software or concepts visually.
- Gaming or entertainment: Share gameplay or media with friends.
Recording complements this by letting you capture the session for later review, training purposes, or archiving memorable moments. While Viber prioritizes user privacy and does not include a built-in recorder for video calls (to prevent unauthorized captures), you can easily use reliable system tools or third-party options.
According to Viber’s official features page, screen sharing is fully integrated on desktop, making it a go-to choice for professional users. For the latest updates, check the official Viber features overview.

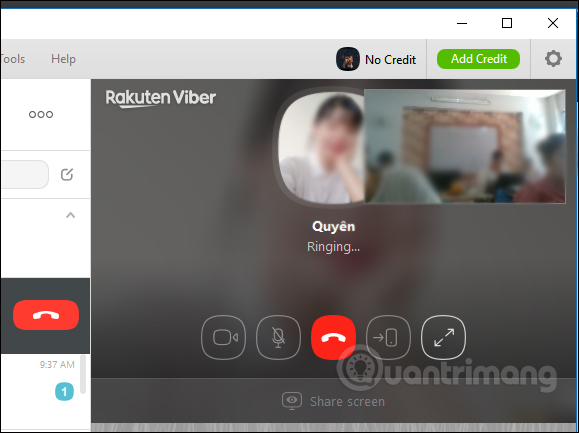
How to Share Your Screen in Viber Video Calls
Viber’s screen sharing feature is primarily available on the desktop version (Windows, macOS, and Linux), where it’s seamless during one-on-one or group video calls. Mobile versions (Android and iOS) do not natively support screen sharing within Viber calls as of 2026, but workarounds exist using system broadcast features.
Step-by-Step Guide for Desktop (Recommended for Best Experience)
- Update and Launch Viber: Ensure you have the latest version installed. You can download or update Viber from the Viber official site.
- Start a Video Call:
- Open Viber on your desktop.
- Select a contact or group.
- Click the video camera icon to initiate a video call.
- Activate Screen Sharing:
- Once the call connects, look for the control panel at the bottom or top of the screen.
- Click the “Share screen” button (it looks like a monitor icon).
- Choose what to share: your entire screen, a specific window, or an application tab.
- Confirm the selection, and your screen will be visible to all participants.
- Manage and Stop Sharing:
- A small overlay will show what’s being shared.
- To stop, click “Stop sharing” in the overlay or call controls.
This feature supports high-resolution sharing with minimal lag, ideal for detailed demonstrations. For group calls (up to 60 participants), everyone can view your shared screen while continuing to chat.
Mobile Alternatives for Screen Sharing
Since native screen sharing isn’t available on mobile Viber calls, use your device’s built-in broadcasting:
- On Android: Start a Viber video call, then swipe down for Quick Settings and select “Screen Cast” or “Smart View” to mirror to another device.
- On iOS: Use AirPlay to mirror your screen to a Mac or Apple TV during the call.
For more advanced mobile optimization, explore tips like compress media before sending in Viber to keep calls smooth when sharing large files alongside.
Pro Tip: Always ask for permission before sharing—it’s good etiquette and respects privacy.
How to Record Viber Video Calls on Different Platforms
Viber does not offer built-in recording for video calls, aligning with privacy-focused policies seen in apps like Signal or WhatsApp. This prevents misuse but means you’ll rely on external tools. Importantly, always obtain consent from all participants before recording, as laws vary by region (e.g., one-party vs. all-party consent).
Recording on Desktop (Windows/macOS)
The easiest method is using built-in tools:
- Windows 11/10:
- Start your Viber video call.
- Press Win + G to open Xbox Game Bar.
- Click “Record” in the Capture widget.
- Include system audio and microphone for full capture.
- Stop via the floating bar; recordings save to Videos > Captures.
- macOS:
- Press Command + Shift + 5 for the screenshot toolbar.
- Select “Record Entire Screen” or a portion.
- Enable microphone audio.
- Start recording before or during the call.
For professional-quality recordings with editing features, third-party tools like OBS Studio (free and open-source) are excellent.
Recording on Android
Most modern Android devices have a built-in recorder:
- Swipe down twice for Quick Settings.
- Tap “Screen Record” (add it if missing via Edit).
- Choose to record audio (device + mic).
- Start the Viber call and begin recording.
- Stop via the notification shade.
Popular apps like AZ Screen Recorder offer extras like pause/resume and no watermarks.
Recording on iOS (iPhone/iPad)
iOS has a robust built-in recorder, though some apps may detect and block video call recording:
- Add Screen Recording to Control Center (Settings > Control Center).
- Start your Viber call.
- Swipe down for Control Center.
- Long-press the Record button and enable microphone.
- Tap Start Recording.
- Stop via the red status bar.
If Viber blocks capture (rare but possible), external tools via Mac connection work well.
Advantages of Recording:
- Create tutorials or meeting minutes.
- Review discussions for accuracy.
- Preserve family moments securely.
Real-World Applications and Benefits
Screen sharing and recording shine in various scenarios:
- Business and Remote Work: Share dashboards or prototypes instantly, reducing email back-and-forth. Combined with Viber’s quick reply shortcuts, responses stay efficient—learn more in this guide on using Viber’s quick reply shortcuts.
- Education and Training: Teachers can demonstrate apps live while recording for absent students.
- Personal Use: Help elderly relatives with device setup or share vacation plans visually.
- Content Creation: Streamers record gameplay sessions shared via Viber groups.
Benefits include improved productivity, clearer communication, and accessibility for visual learners. In 2026 trends, hybrid work continues to drive demand for such features, with apps like Viber competing against Zoom and Teams by offering free, no-time-limit calls.
Common Issues and Troubleshooting
- Lag During Sharing: Close background apps or switch to a stronger Wi-Fi connection.
- No Audio in Recordings: Ensure microphone/system sound is selected in your recorder settings.
- Mobile Limitations: If native sharing is needed on mobile, consider alternatives like Zoom for hybrid setups.
- Permission Errors: Update Viber and grant screen recording permissions in system settings.
- Privacy Concerns: Viber’s encryption protects live calls, but recordings are stored locally—keep them secure.
If issues persist, visit Viber support or community forums.
Latest Trends in Video Calling (2026 Update)
As remote collaboration evolves, features like AI-powered backgrounds, real-time translation, and enhanced screen sharing are becoming standard. Viber continues to innovate with seamless desktop-mobile sync and larger group limits. Recording tools are integrating AI for auto-transcription, making post-call reviews easier.
Master Viber for Better Collaboration
Mastering screen sharing in Viber video calls and recording Viber calls unlocks powerful ways to communicate effectively. While desktop excels at native sharing, mobile and external recorders fill the gaps perfectly. These tools make Viber a versatile choice for personal and professional use.
Ready to get started? Download the latest version from the Viber official download page and elevate your next video call today. With practice, you’ll wonder how you ever managed without these features.