Viber is a leading cross-platform messaging and calling application used worldwide for personal and business communication. With features like end-to-end encryption, voice calls, video calls, and group chats, Viber provides secure and reliable communication. While many users rely on mobile versions, installing Viber on a Windows PC offers larger screen usability, easier typing, and seamless syncing across devices.
This guide will walk you through how to install Viber on Windows PC step by step, including practical applications, advantages, common issues, and the latest trends. It also incorporates trusted resources to ensure a safe and effective setup.
Step-by-Step Installation Guide
Step 1: Check System Requirements
Ensure your PC meets these requirements:
- OS: Windows 7, 8, 10, or 11
- RAM: 2 GB or higher
- Disk Space: Minimum 200 MB
- Internet: Required for download and syncing
Step 2: Download Viber for Windows
For safety, download Viber from official and reputable sources. The official Viber PC installation guide provides the latest installer. You can also verify downloads via CNET’s Viber download page to ensure the file is secure. Avoid third-party sites that may distribute outdated or unsafe versions.
Step 3: Install Viber
- Locate the downloaded file, usually in the Downloads folder.
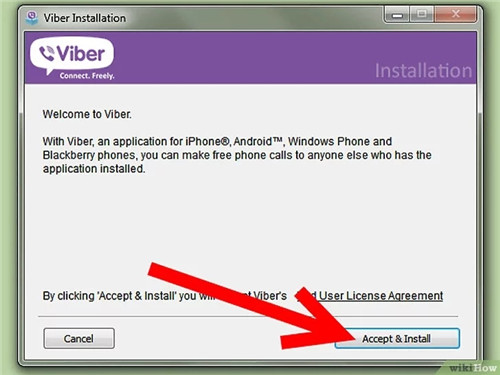
- Double-click the installer to launch the setup wizard.
- Follow instructions:
- Accept the license agreement
- Select installation location (default is fine)
- Click Install
Installation typically takes 2–5 minutes.
Step 4: Set Up Viber
After installation:
- Open Viber on your PC.
- A QR code will appear.
- Open Viber on your mobile, go to More > QR Code, and scan to link devices.
- Alternatively, log in with your mobile number and verification code.
For additional guidance, Lifewire’s Viber tutorial explains linking mobile and desktop accounts effectively.
Step 5: Using Viber on PC
- Start or join chats, make voice/video calls
- Manage groups and share media files
- Customize notifications and settings for convenience
- Enjoy seamless syncing across devices
For detailed reviews and feature insights, check TechRadar’s Viber guide.
Advantages of Viber on PC
- Cross-Platform Messaging: Syncs automatically with mobile.
- Enhanced Productivity: Larger screen and keyboard improve usability.
- Security: End-to-end encryption protects messages and calls.
- Convenience: Easy media sharing and group management.
Common Issues and Solutions
1. Messages Not Syncing
- Ensure mobile app has an internet connection.
- Re-login on both devices to refresh sync.
2. Installation Errors
- Verify system requirements.
- Disable antivirus temporarily if it blocks the setup.
3. Login Verification Problems
- Check your phone number and code accuracy.
- Update mobile app to the latest version.
4. Audio/Video Issues
- Update sound drivers and check camera/microphone permissions.
Latest Trends in Viber
- Business Integration: Direct messaging with customers.
- AI Features: Smart replies save time.
- Cross-Device Support: Login on multiple devices simultaneously.
- Security Updates: Continuous improvements in encryption.
Best Practices
- Regular Updates: Ensure access to new features and security patches.
- Backup Chats: Prevent accidental data loss.
- Strong Passwords: Secure linked PC sessions.
- Adjust Settings: Optimize notifications and privacy preferences.
Conclusion
Installing Viber on Windows PC enhances communication, productivity, and security. Following this step-by-step guide ensures smooth installation and device linking. With proper setup, you can enjoy a seamless messaging experience, manage group chats, make secure calls, and leverage Viber’s features on a larger screen.


